To mount EufyCam 3 on log cabin walls without splitting the timber, drill a pilot hole 75% of the diameter of your mounting screws, choose a flat, knot-free section of log, and use stainless steel exterior screws sealed with butyl tape behind the bracket. The natural movement of timber, combined with the dense, dry heartwood common in older log walls, makes pre-drilling non-negotiable. This 2026 guide walks through exact bit sizes, sealants, bracket angles, and weatherproofing steps that cabin owners are using to keep their EufyCam 3 rock-solid without cracking checks into expensive logs or voiding any extended warranty on the housing.
Why mounting a EufyCam 3 on log walls is different from drywall or siding
Top Picks
Log walls behave nothing like the flat sheathing most camera brackets are designed for. A finished log surface is curved, often uneven across knots, and shrinks and swells with seasonal humidity. Driving a fastener straight into dry pine, cedar, or spruce without pre-drilling forces the wood fibers apart and almost always produces a radial check (a crack running from the screw toward the heart of the log). Once that check opens up, water gets in, the screw loses grip, and your EufyCam 3 starts wobbling in the wind within a season or two.

The EufyCam 3 mounting plate is small and rigid, which actually helps: you only need two anchor points to land cleanly, and you can almost always avoid drilling through a knot or a chink line. The trick is treating the log like a structural timber rather than a wall.
Tools and materials checklist for 2026
- Cordless drill with adjustable clutch (set to a low torque setting)
- Brad-point or auger drill bit set: 1/16", 5/64", and 3/32" for pilot holes
- #8 x 1-1/2" or #8 x 2" stainless steel exterior wood screws (316 grade ideal for coastal cabins)
- Butyl tape or a small tube of clear polyurethane sealant (Sikaflex 291 or equivalent)
- Painter's tape and a pencil for marking
- A small bubble level (or a phone level app)
- A scrap of cedar shim for uneven log faces
- Optional: a 1" Forstner bit if you need to flatten a small landing pad on a rounded log
Step-by-step: how to mount EufyCam 3 on log cabin walls
Follow this sequence and the timber stays intact. Skip a step and you risk a hairline split that won't show up until the first hard freeze.
1. Pick the right log course
Aim for a log course at roughly 9 to 10 feet of ground height for the widest field of view and the lowest chance of tampering. Avoid the top and bottom courses (those are where settling stress concentrates) and never mount across a chink line - the bracket needs to sit on a single log.
3. Mark and pre-drill
Stick a strip of painter's tape over your mounting points - this prevents the bit from skating across the log surface and gives you a clean place to mark. For #8 stainless screws, a 3/32" pilot hole is the sweet spot in seasoned softwood; step down to 5/64" if you're working with dense Douglas fir or old-growth pine. Drill at a deliberate, slow speed. Fast drilling generates heat, which dries the surrounding fibers and increases split risk.
4. Seal the pilot hole
Before you drive the screw, squeeze a small bead of polyurethane sealant into the pilot hole. This does two things: it locks the threads against vibration, and it prevents moisture from wicking down the fastener into the log core. A 1/4" bead is plenty.
5. Apply butyl tape behind the bracket
Cut two small squares of butyl tape and stick them to the back of the EufyCam 3 mounting plate, right around each screw hole. When you tighten the bracket down, the butyl compresses into any gaps and creates a permanent water seal.

6. Drive the screws by hand at the end
Run the drill until the bracket is almost flush, then finish the last quarter turn with a manual screwdriver. This is the single biggest tip in this whole guide - overdriving with a powered driver is what cracks logs. The screw should feel firm but not crushed into the wood.
7. Snap on the camera and aim
Clip the EufyCam 3 onto the magnetic ball mount, walk through your detection zones in the Eufy Security app, and confirm the PIR sensor is angled across the path of likely motion rather than straight at it.
Best alternative cameras for log cabin owners in 2026
If you're still shopping or want a second camera to cover a blind side of the cabin, these four wireless systems install with the same pilot-hole technique and are popular with off-grid and seasonal cabin owners this year.
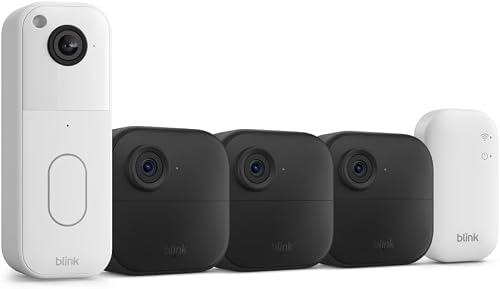
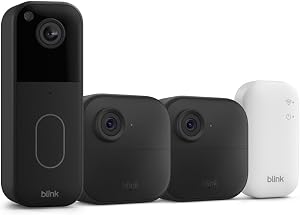
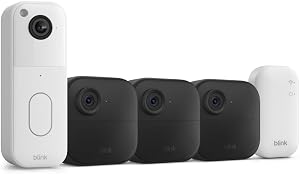
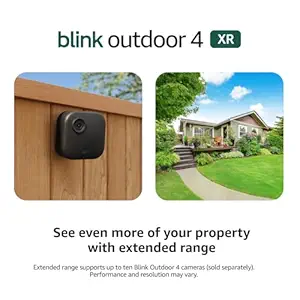
Best overall coverage: Blink Outdoor 4 XR Wireless Camera, 2-Year Battery (4-cam kit)
The Blink Outdoor 4 XR kit is the easiest way to ring a small cabin in coverage without running any wire. Each camera weighs under 7 ounces, so a single pair of #8 screws into pre-drilled pilot holes holds firm even through freeze-thaw cycles. The two-year battery life is the killer feature for remote cabins where you're not visiting weekly. Check the 4-cam Blink Outdoor 4 XR kit on Amazon.
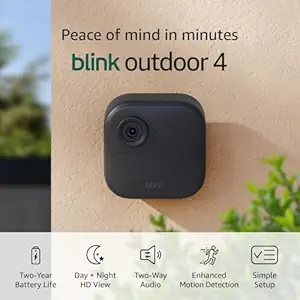
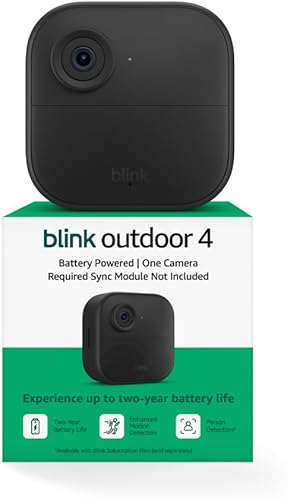
Best budget single camera: Blink Outdoor 4 Wireless Smart Security Camera
A single Blink Outdoor 4 is the cheapest reliable way to get one log-wall camera installed. The mounting bracket footprint is small (about 2.5" across), which makes it easy to land on a clean section of log between knots. Pair it with the same butyl-tape technique used for the EufyCam 3. See the single Blink Outdoor 4 on Amazon.
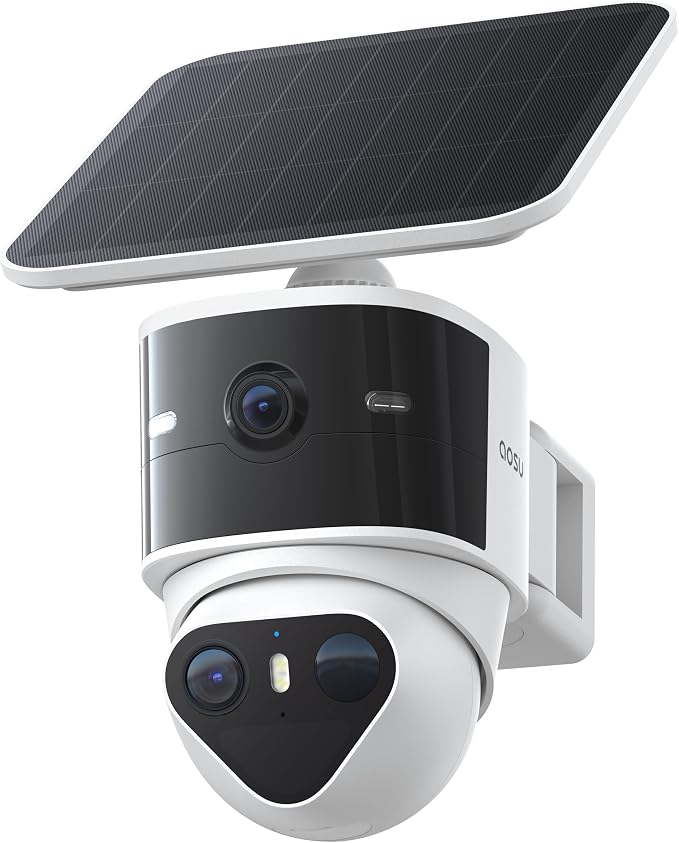
Best resolution: aosu T2 Pro Wireless Outdoor Security Camera, 3K Dual Cam
The aosu T2 Pro is the standout pick if you want to read a license plate at the end of a long cabin driveway. The dual-lens 3K sensor handles the high-contrast lighting around log walls (bright snow glare, deep eave shadows) better than a single-lens 2K camera. It's a bit heavier than the Blink, so use #8 x 2" screws and pre-drill to 3/32". View the aosu T2 Pro 3K on Amazon.
Best mid-range upgrade: Blink Outdoor 2K+ Wireless Smart Security Camera
If you want a step up in image quality without leaving the Blink ecosystem, the Outdoor 2K+ slots in with the same bracket pattern as the Outdoor 4 but delivers noticeably sharper footage at night - useful when the only light is a porch sconce against a dark log facade. Look at the Blink Outdoor 2K+ on Amazon.
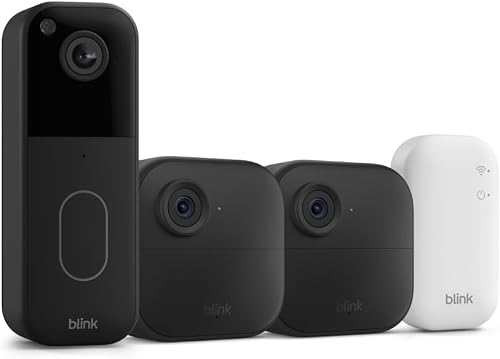
Best for whole-cabin systems: Blink Outdoor 4 Wireless Security Camera System
The bundled Outdoor 4 system includes the Sync Module 2, which lets you add local USB storage - a huge advantage at cabins with spotty internet. Same lightweight mounting requirements as the rest of the Blink line. Browse the Blink Outdoor 4 system on Amazon.
Quick comparison table
| Camera | Resolution | Battery life | Weight on log | Best for |
|---|---|---|---|---|
| Blink Outdoor 4 XR (4-cam) | 1080p HDR | Up to 2 years | Light | Whole-cabin coverage |
| Blink Outdoor 4 (single) | 1080p HDR | Up to 2 years | Light | Single-zone budget pick |
| aosu T2 Pro 3K Dual | 3K dual-lens | Rechargeable | Medium | Long driveway detail |
| Blink Outdoor 2K+ | 2K | Up to 2 years | Light | Sharper night footage |
| Blink Outdoor 4 System | 1080p HDR | Up to 2 years | Light | Local storage at remote cabins |
Sealing, weatherproofing, and seasonal log movement
Log walls move. A 10-inch diameter log can swell or shrink by 1/8" or more between a humid August and a dry January, and that movement will work any rigid bracket loose over time if you didn't plan for it. The butyl tape sandwich described above is the simplest fix - it stays flexible across temperature swings and self-heals around the screw shanks. For exposed walls that take direct sun, re-inspect the bracket every spring and re-tighten the final quarter turn by hand if needed.

If your cabin sits in heavy snow country, also check that snow doesn't slide off the roof directly onto the camera. A small drip-edge piece of flashing screwed into the log course above the camera (using the same pilot-hole method) is cheap insurance.
Common mistakes that crack timber
- Driving screws into knots. Knots are harder and more brittle than the surrounding wood and split radially under any fastener load. Always shift the bracket 1-2 inches to clear a knot.
- Using deck screws instead of stainless. Yellow-zinc deck screws corrode against the tannins in cedar and oak, staining the log and weakening the joint within a couple of seasons.
- Skipping the pilot hole. The fastest way to ruin a log wall. There is no log species soft enough to forgive this.
- Mounting across a chink line. The bracket needs to sit on one log, not bridge two. Bridging means one screw moves seasonally relative to the other and eventually one of them backs out.
- Over-torquing with a power driver. Set your clutch low or finish by hand.
For more cabin-specific camera advice, see our guides on solar-powered cameras for off-grid cabins, outdoor security cameras for extreme cold, and hiding camera wires on cedar siding.
Frequently Asked Questions
What size pilot hole should I drill to mount EufyCam 3 on log cabin walls?
For the #8 stainless screws that pair best with the EufyCam 3 bracket, a 3/32" pilot hole in seasoned pine, cedar, or spruce is ideal. Step down to 5/64" for dense Douglas fir or old-growth heartwood. The rule of thumb is roughly 75% of the screw's root diameter.
Can I use the magnetic mount alone on a log wall without screws?
No. The included magnetic ball mount is meant to sit on top of a screwed-down base. Logs flex too much for adhesive-only mounting, and the magnet can't grip wood directly. Always screw the base plate in and let the magnet handle the camera body.
How do I keep moisture from getting behind the EufyCam 3 bracket?
Use two small squares of butyl tape behind the bracket around each screw hole, plus a 1/4" bead of polyurethane sealant inside each pilot hole before driving the screw. Together they create a permanent moisture seal that flexes with the log.
Will mounting screws split a dry, aged log?
Only if you skip the pilot hole or hit a knot. Aged logs are drier and more brittle than fresh ones, so they actually need more careful pre-drilling - but with a proper 3/32" pilot hole and a slow drive speed, a 50-year-old log accepts a #8 screw without complaint.
How high should I mount EufyCam 3 on a log cabin?
9 to 10 feet off the ground is the sweet spot. That height keeps the camera out of casual tamper range, gives the PIR sensor a useful downward angle across walking paths, and usually lands you on a flatter log course away from settling stress at the top and bottom of the wall.
What if my log wall is too curved for the bracket to sit flat?
Two options: use a 1" Forstner bit to gently flatten a small landing pad (no deeper than 1/8") for the bracket, or cut a cedar shim wedge to fill the gap behind the plate. Either way, seal generously with butyl tape so no water tracks behind the bracket.
Can I remove the camera in winter without leaving holes in the log?
Yes - the EufyCam 3 itself pops off the magnetic ball mount in seconds, so you can bring the camera inside seasonally and leave just the small bracket on the wall. If you ever remove the bracket entirely, fill the screw holes with a tinted exterior wood filler that matches your log stain.
Key Takeaways
- Choosing the right mount eufycam 3 on log cabin walls means matching capacity and output ports to your actual devices
- Always check actual watt-hours (Wh), not just watts — runtime depends on Wh, not peak output
- Also covers: eufycam 3 log home installation
- Also covers: drilling log siding for security camera
- Also covers: eufycam 3 mounting bracket cabin
- Compare price-per-Wh across models to find the best value for your budget